All Blogs, Paint Equipment
Revive Your Old Furniture: A Quick Guide on How to Paint Old Wooden Furniture
Furniture Paint to upcycle is space to give new life into your old wooden furniture and it is easier than you might think. With the right approach and a bit of effort, you can transform that worn-out table or chair into a vibrant statement piece. This guide will walk you through the process of giving your wooden furniture a professional-quality paint job.
Identifying Lead Paint
Caution! Before you begin working on your furniture, it’s essential to determine if the old paint contains lead. Lead-based paint can be hazardous if inhaled or ingested. Lead testing kits are readily available at most home improvement stores. Remember, the following steps are only applicable for non-lead-based paint.
Stripping Off The Old Paint On Your Wooden Furniture
Loose or flaking paint should be removed before applying a new coat. Use a scraper to gently remove the old paint, taking care not to damage the wood underneath. It’s best to hold the scraper parallel to the wood surface and apply even pressure.
Sanding for Smoothness
Once the old paint is removed, sand the entire piece of furniture to create a smooth, even surface. Start with a coarse 80- to 100-grit sandpaper, then switch to a finer 150- to 200-grit paper for a silky finish. Remember, always sand in the direction of the wood grain.
Pro Tip: Using a palm sander can make this process easier and more efficient.
Reaching the Crevices
Intricate designs and hard-to-reach spots may require hand-sanding. After you’ve sanded the entire piece, wipe it down with a tack cloth to remove any dust or debris.
Priming the Surface
Next, apply a primer to the surface. This step helps to ensure even paint coverage and prevents stains from bleeding through the new paint. When choosing a primer, consider the colour of the paint you plan to use. A white primer works best under light paint colours, while a darker primer is ideal for darker hues.
Remember to apply the primer in a slow, steady motion, following the natural lines of the furniture. Apply two to three light coats, allowing each one to dry to the touch before applying the next.
Final Sanding
If the primed surface feels rough, a bit of light sanding with fine sandpaper can smooth it out. Be sure to wipe down the piece with a tack cloth afterwards to remove any dust.
Applying the Furniture Paint
Now, it’s time to add colour! Apply the paint in smooth, even strokes, following the natural lines of the furniture. Use a high-quality nylon bristle brush for the best results. Apply two to three light coats, allowing each coat to dry to the touch before the next application.
Pro Tip: If a drip occurs, quickly smooth it out with your brush to prevent runs in the paint.
Sealing with a Clear Coat
A polyurethane clear coat can add a glossy sheen and protect the paint from damage. Be sure to match the type of clear coat with your paint—oil-based for oil paint and water-based for water-based paint. Apply the clear coat in the same manner as the paint, and after the first coat dries, lightly sand the piece for a professional finish before applying the final coat. Have a look at our clear varnish.
Letting it Dry
Patience is key here. Allow your furniture to fully cure in a warm, dry, well-ventilated area for at least 24 hours before use.
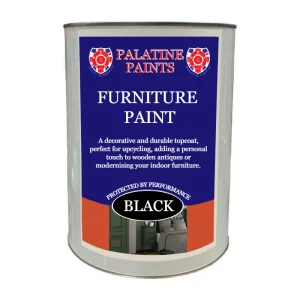
Palatine Paints Furniture Paint
Additional Tips
- Always use a primer before painting to prevent stains from seeping through.
- Match your primer to your paint—oil-based primer with oil-based paint, and latex primer with latex paint.
- Never leave primer unpainted.
- For the best outcome, start painting from the top of the piece and work your way down, smoothing out any drips as you go.
By following these steps, you can expertly paint your wooden furniture and create a new aesthetic in your home. So, before you decide to discard that old chair or table, consider the potential it has for a second life.
Remember: Painting is not just about adding colour—it’s about creating a new identity for your furniture.
Check the range of our brushes & rollers
Contacting us is easy!
Email: [email protected]
Call Us: 01942 884 122
Contact form: https://www.palatinepaints.co.uk/contact-us
Live Chat Service: Press the small blue icon at the bottom left of your screen.


